How to prevent generation of Java folders in a SBT project using sbteclipse

If you’re using sbteclipse in a SBT project and there are no Java files in your project, you don’t need of both src/main/java and src/test/java folders. But every time you run “sbt eclipse”, the Java folders are regenerated.

There is a way to prevent those directories from being generated. To do that you need to avoid the Java source directories to be created, simply redefine unmanagedSourceDirectories by adding these two settings:

1
2
unmanagedSourceDirectories in Compile <<= (scalaSource in Compile)(Seq(_)),
unmanagedSourceDirectories in Test <<= (scalaSource in Test)(Seq(_))

And it’s an example of a build.scala file, see how you can add those settings:

1
2
3
4
5
6
7
8
9
10
11
12
13
14
15
object AppBuilder extends Build {

  val appSettings = Seq(
    name := "apptest",
    organization := "com.rlazoti",
    version := "0.0.1-SNAPSHOT",
    scalaVersion := "2.10.2",
    unmanagedSourceDirectories in Compile <<= (scalaSource in Compile)(Seq(_)),
    unmanagedSourceDirectories in Test <<= (scalaSource in Test)(Seq(_))
  )

  lazy val app = Project("apptest", file("."))
    .settings(appSettings : _*)

}

Comments »


Fui na trilha Scala do TDC 2013

Dia 13/07/2013 compareci ao evento TDC 2013 para assistir as palestras da trilha de Scala.

A trilha começou com uma palestra sobre programação funcional para desenvolvedores com conhecimento em orientação a objetos, ela foi apresentada pelo José Renato Pequeno e Alan Vidotti Prando. Esta palestra explicou a origem e conceitos da programação funcional, assim como alguns exemplos em Scala.

Depois tivemos a excelente palestra sobre Typeclasses com o Rafael de França Ferreira, onde o Rafael mostrou diretamente em código como utilizar e para que serve Typeclasses em Scala. O código dessa palestra está disponível no Github.

Na sequência rolou um bate-bato liderado pela Priscila Mayumi Sato sobre o projeto VidaGeek Game e os desafios de incluir novos jogos dentro da plataforma.

Logo em seguida o Raphael Henrique Rodrigues de Almeida falou sobre o Scalatra e em quais cenários o seu uso é mais recomendado e o caminho das pedras para quem quer começar a utilizar o Scalatra.

Em seguida o Juliano P Alves continuou falando um pouco mais sobre Scalatra, mas além do framework em si, ele mostrou como utilizá-lo para criar Single Page Applications em conjunto com Backbone.js e outros frameworks Javascript.

A penúltima palestra foi feita pelo Paulo (JCranky) Siqueira, ele mostrou como fazer algumas simples otimizações para melhorar a quantidade de requisições atendidas em um projeto pessoal dele que utiliza Play 2 e Akka.

E para finalizar a trilha, o Breno Corni Ferreira explicou o que é Functional Reactive Programming e como utilizá-la em Scala com a lib RxJava.

Para concluir, a trilha em si foi excelente assim como todas as palestras (mesmo tendo alguns contratempos), a comunidade de Scala parace estar crescendo e vi também pessoas de outras comunidades se interessando pela tecnologia (o que é muito bom). :)

Comments »


Getting started with Maven and Scala

Even though Scala is commonly used with SBT, it’s also possible to use it with Maven, particularly if you already have a Maven based project and you want to use Scala with it.

So, let’s use a pom.xml for a simple java application like this:

1
2
3
4
5
6
7
8
9
10
11
12
13
14
15
16
17
18
19
20
21
<project xmlns="http://maven.apache.org/POM/4.0.0" xmlns:xsi="http://www.w3.org/2001/XMLSchema-instance"
  xsi:schemaLocation="http://maven.apache.org/POM/4.0.0 http://maven.apache.org/xsd/maven-4.0.0.xsd">
  <modelVersion>4.0.0</modelVersion>
  <groupId>br.com.rodrigolazoti</groupId>
  <artifactId>scalaproject</artifactId>
  <version>0.0.1-SNAPSHOT</version>
  <packaging>jar</packaging>

  <properties>
    <project.build.sourceEncoding>UTF-8</project.build.sourceEncoding>
  </properties>

  <dependencies>
    <dependency>
      <groupId>junit</groupId>
      <artifactId>junit</artifactId>
      <version>4.11</version>
      <scope>test</scope>
    </dependency>
  </dependencies>
</project>

Right, now let’s set up the project’s pom file to adding support for Scala code.

####Add scala-tools repository

The Maven needs to know where to find the plugin and the Scala library, so add this repository to pom.xml:

1
2
3
4
5
6
<repositories>
  <repository>
    <id>scala-tools</id>
    <url>https://oss.sonatype.org/content/groups/scala-tools/</url>
  </repository>
</repositories>

####Add scala library dependency

The scala’s version that I’ll use for this example is 2.10.0.

Add this dependency to pom.xml:

1
2
3
4
5
<dependency>
  <groupId>org.scala-lang</groupId>
  <artifactId>scala-library</artifactId>
  <version>2.10.0</version>
</dependency>

####Add maven-scala-plugin

Add the maven-scala-plugin to pom.xml:

1
2
3
4
5
6
7
8
9
10
11
12
13
14
15
16
17
18
19
<build>
  <sourceDirectory>src/main/scala</sourceDirectory>
  <testSourceDirectory>src/test/scala</testSourceDirectory>
  <plugins>
    <plugin>
      <groupId>org.scala-tools</groupId>
      <artifactId>maven-scala-plugin</artifactId>
      <version>2.15.2</version>
      <executions>
        <execution>
          <goals>
            <goal>compile</goal>
            <goal>testCompile</goal>
          </goals>
        </execution>
      </executions>
    </plugin>
  </plugins>
</build>

####Add some Scala code

Let’s add some scala code to the project.

Create a file called /src/main/scala/App.scala and put the following code into it:

1
2
3
4
5
object App extends App {

  List("Hello ", "world", "!") foreach print 

}

####Conclusion

From now on you can execute mvn package to build your project or mvn test to test your project, and the Scala code will get built automatically. ;)

See below the complete project’s pom file:

1
2
3
4
5
6
7
8
9
10
11
12
13
14
15
16
17
18
19
20
21
22
23
24
25
26
27
28
29
30
31
32
33
34
35
36
37
38
39
40
41
42
43
44
45
46
47
48
49
50
51
52
53
54
55
56
57
58
59
60
61
62
<project xmlns="http://maven.apache.org/POM/4.0.0" xmlns:xsi="http://www.w3.org/2001/XMLSchema-instance"
  xsi:schemaLocation="http://maven.apache.org/POM/4.0.0 http://maven.apache.org/xsd/maven-4.0.0.xsd">
  <modelVersion>4.0.0</modelVersion>
  <groupId>br.com.rodrigolazoti</groupId>
  <artifactId>scalaproject</artifactId>
  <version>0.0.1-SNAPSHOT</version>
  <packaging>jar</packaging>

  <properties>
    <project.build.sourceEncoding>UTF-8</project.build.sourceEncoding>
  </properties>

  <repositories>
    <repository>
      <id>scala-tools</id>
      <url>https://oss.sonatype.org/content/groups/scala-tools/</url>
    </repository>
  </repositories>

  <dependencies>
    <dependency>
      <groupId>org.scala-lang</groupId>
      <artifactId>scala-library</artifactId>
      <version>2.10.0</version>
    </dependency>

    <dependency>
      <groupId>junit</groupId>
      <artifactId>junit</artifactId>
      <version>4.11</version>
      <scope>test</scope>
    </dependency>
  </dependencies>

  <build>
    <sourceDirectory>src/main/scala</sourceDirectory>
    <testSourceDirectory>src/test/scala</testSourceDirectory>
    <plugins>
      <plugin>
        <groupId>org.scala-tools</groupId>
        <artifactId>maven-scala-plugin</artifactId>
        <version>2.15.2</version>
        <executions>
          <execution>
            <goals>
              <goal>compile</goal>
              <goal>testCompile</goal>
            </goals>
          </execution>
        </executions>
        <configuration>
          <args>
            <arg>-optimise</arg>
            <arg>-unchecked</arg>
            <arg>-deprecation</arg>
          </args>
          <charset>UTF-8</charset>
        </configuration>
      </plugin>
    </plugins>
  </build>
</project>

Comments »


Why and how I migrated from Wordpress to Jekyll

Since I started writing this blog I’ve always used Wordpress and it’s great, but the need to update Wordpress and its plug ins (a lot of them) always annoyed me.

Even I don’t have much more time to write here I always wanted to write again. After I decided to write back, I also decided to improve my blog, with a new theme and a better and fun way to write posts.

####My choice and why I chose to migrate this blog from Wordpress to Jekyll. But why Jekyll?

Unlike Wordpress, Jekyll isn’t a full CMS, it’s a lot simpler, I can have a static site that is a lot lighter than Wordpress and mainly I just wanted to learn a new tool.

More reasons why I choose Jekyll were:

####How moving into Jekyll First thing I did was install the Disqus plug in and migrate all comments into it, this allowed me to keep my comment history and use them easily into Jekyll.

Second I exported all my blog in a XML file and used Exitwp tool to convert my wordpress blog to jekyll. I had only to modify the image url in all posts and change syntax highlighting tag used in wordpress for liquid tag (pygments).

Ultimately I had to look for a new theme, I found the Left theme for Jekyll develop by Zach Holman so I decided to use it as a base for my own new theme.

####Hosting on Github Pages Well, hosting static content in Github Pages is a piece of cake and it’s completely free. I just had to create a new repository there and send (git push) my files to it. It’s super easy! :)

I’ve used the pages below to understand how to use Jekyll with Github Pages and how to set up my own domain.

Comments »


How to install htop on MacOS

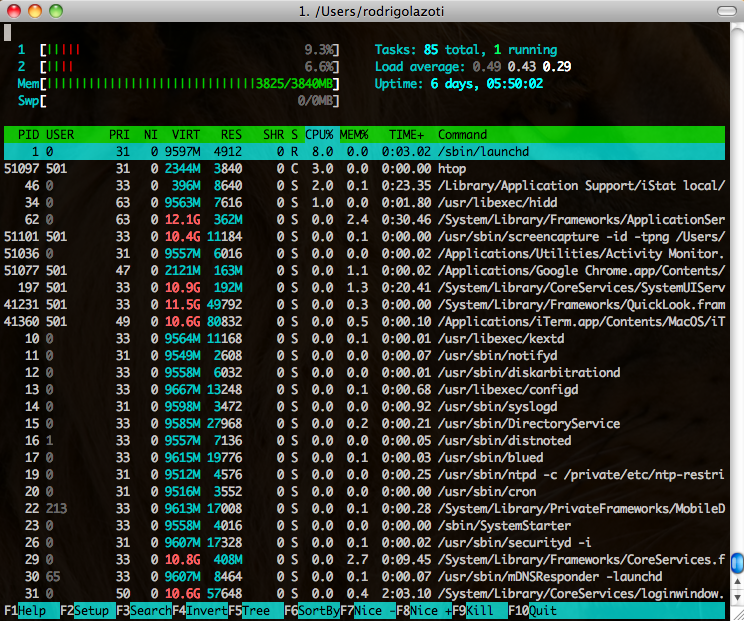
htop is a great interactive process viewer in text-mode, but unfortunately it works only on Linux. Fortunately I found in Github a htop version for OSX and it works perfectly.

To install it, before you’ll need to have git (if you already don’t have git installed :]). So, below you can see how to install it.

1
2
3
4
5
6
7
8
git clone git://github.com/AndyA/htop-osx.git
cd htop-osx
git checkout -b osx origin/osx
export CFLAGS="-m32"
./autogen.sh
./configure
make
sudo make install

To run it, just execute htop in your terminal. ;)

Comments »